Team Edition users can create workflow rules to automatically trigger action items and delegate tasks to the responsible parties on their team. Compliance.ai’s Workflow automatically notifies you and the responsible team member as soon as a relevant change occurs, based on the rules established in the workflow.
Creating a workflow
Compliance.ai’s automatic workflow helps you assign tasks, track due dates and monitor progress relevant to specific regulatory changes.
Step 1: Create customized alerts
Please refer to our Alerts and Notifications Guide for more details.
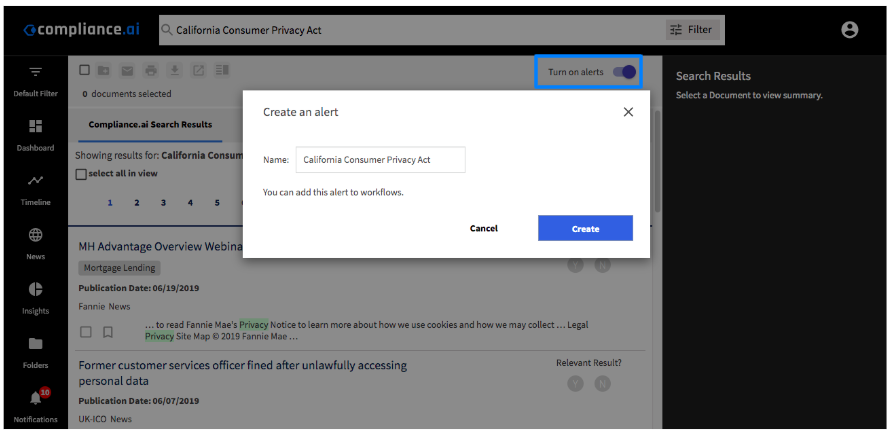
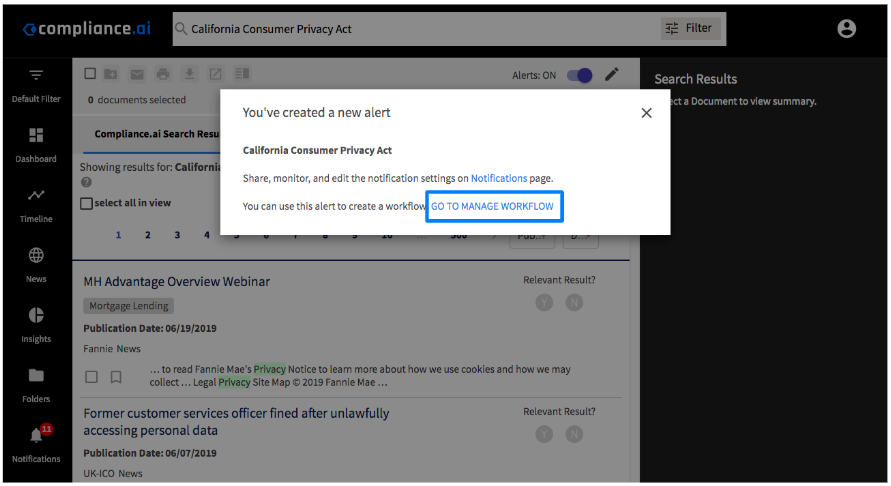
Note: After saving the alert, you will be prompted with an option to immediately “Go To Manage Workflow” to create a new flow for that alert. If you already have a set of alerts created, then you can move on to the next step.
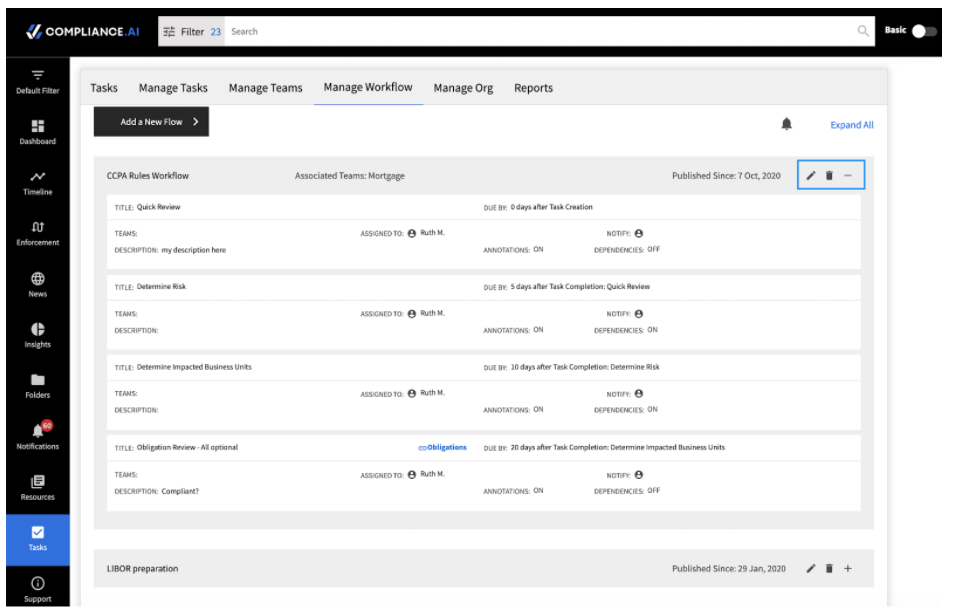
Step 2: Select the tab for Tasks, then go to Manage Workflow
Select “Add a New Flow” then decide to either “Start with a template” or “Start from scratch.” Most users choose to start from scratch, but if you have a standardized corporate process, you should create a template and share across your organization.
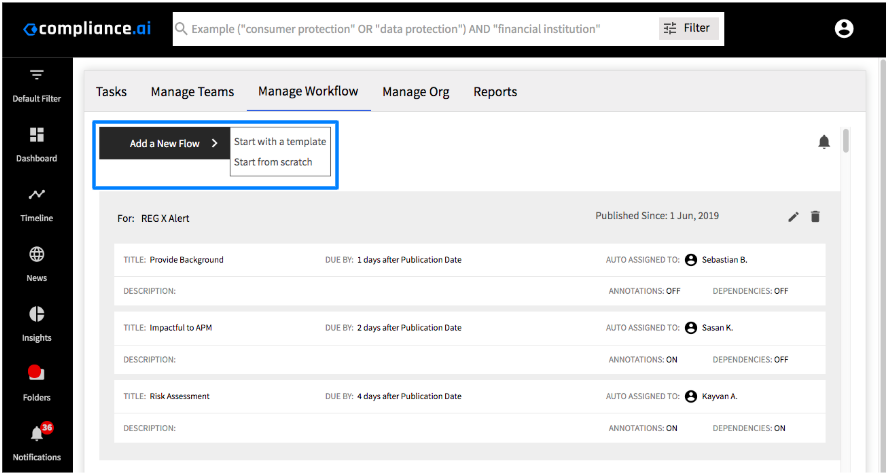
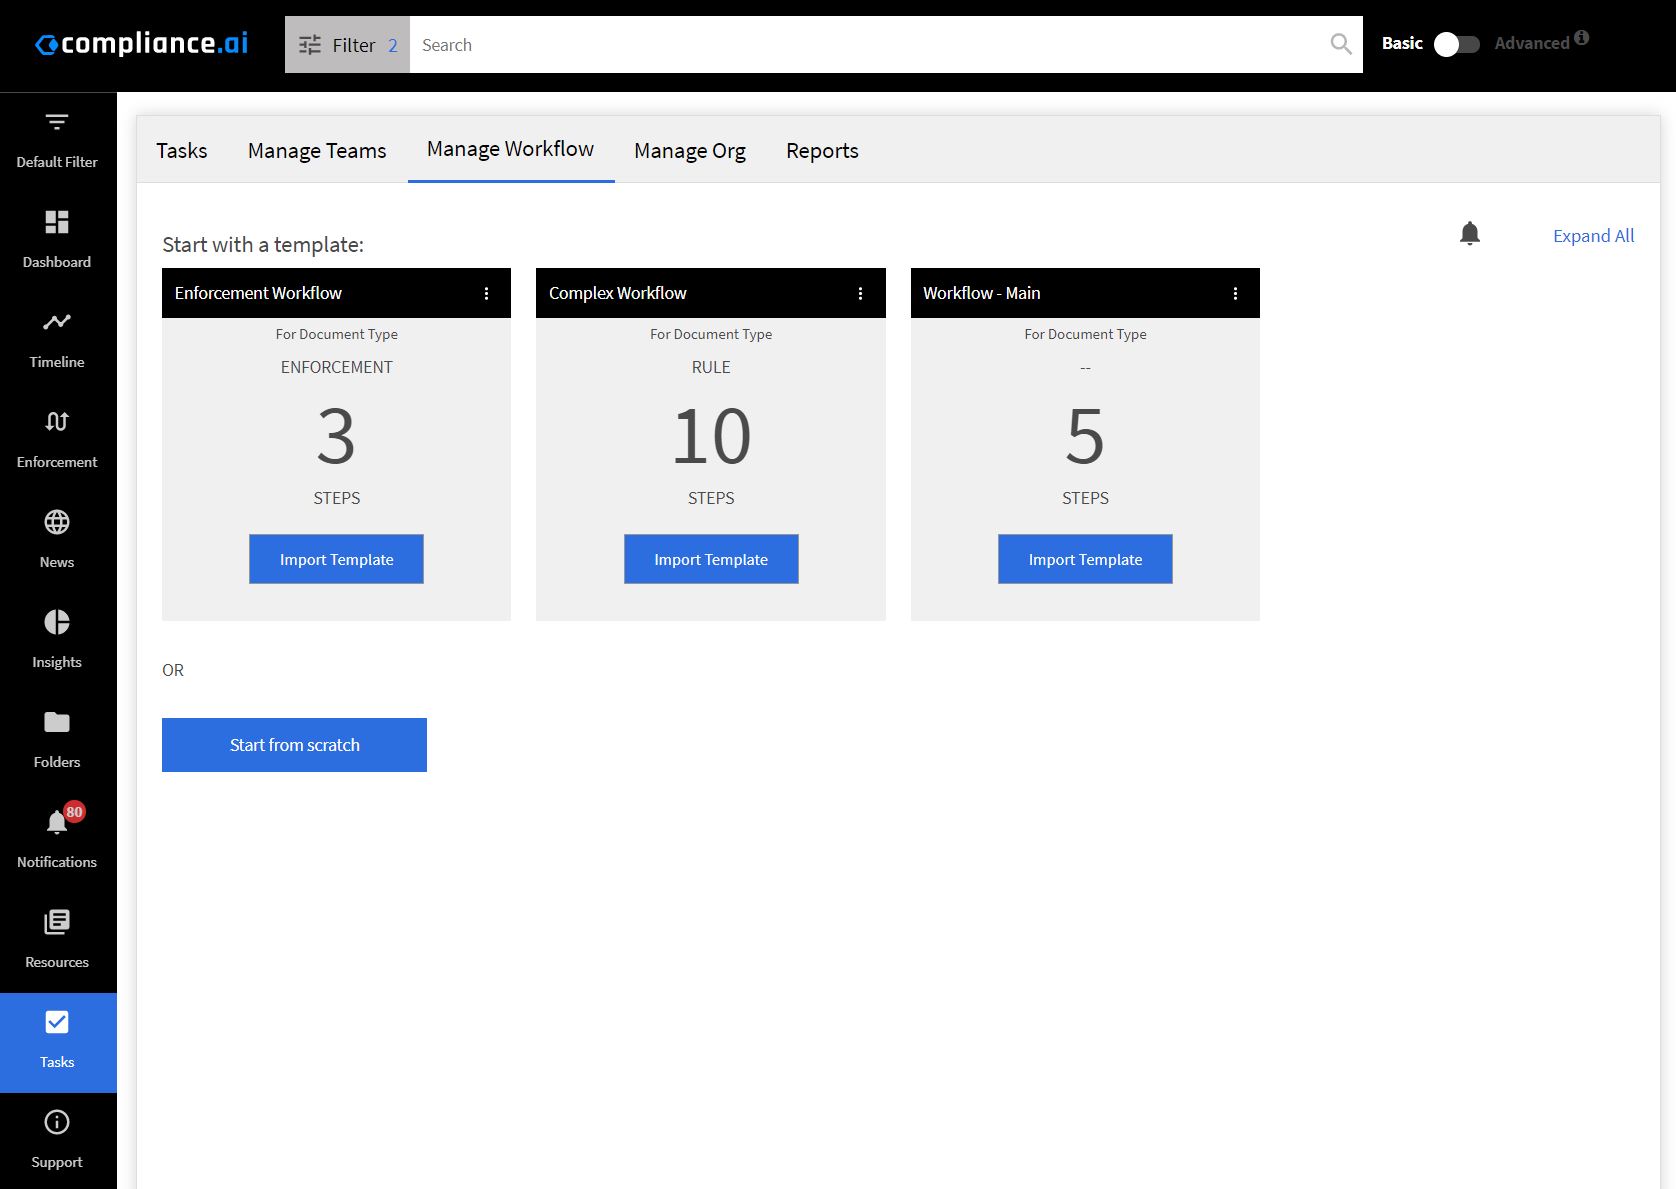
Start with a Template: This option will allow you to import an existing template you have used in a previous workflow.
Start From Scratch: This option allows you to customize a new series of action items and team assignments.
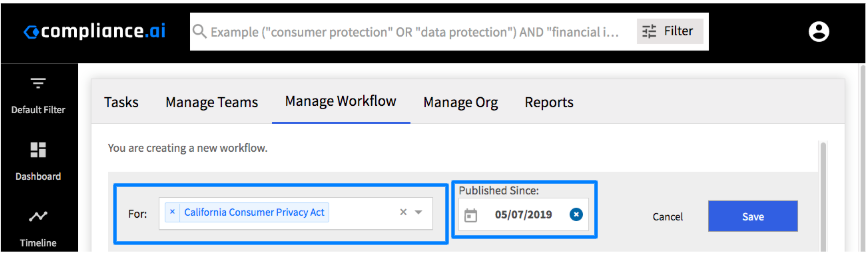
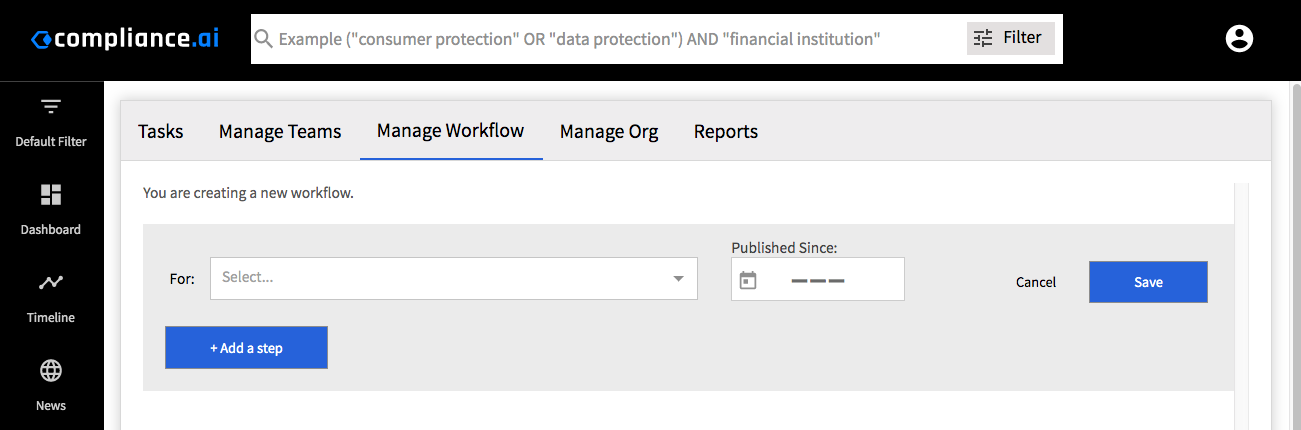
Step 3: Select the Alert you would like to trigger the workflow.
Any time a change occurs related to that specific alert, the same series of tasks will be assigned.
Note: You can choose to backdate this workflow up to 30 days prior by selecting the “Published Since” date if you want to start evaluating documents that have already been published.
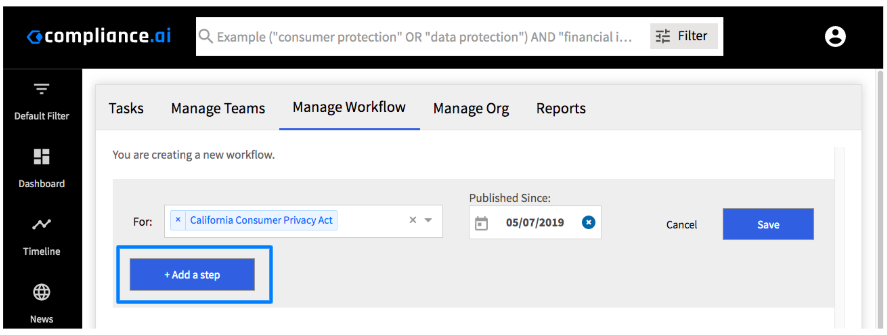
Step 4: Next, select the “add a step” button. This is where you will set up the recurring tasks.
Apply a general title like read or evaluate, then describe the specifics for the assignment in more detail within the description.
Select the due date criteria based on either the: Publication Date, Effective Date, Comment Close Date, or Task Creation Date. In most cases, users select Publication Date for the first task in a workflow, but if you anticipate adding the workflow to previously published documents, you may wish to select Task Creation Date to ensure that the first task is always due in the future.
Next, assign the task to a member of your team. If you or others in your organization would like to be notified about the status of a task, you can add those individuals to the “Notify” field.
You can apply additional requirements like attaching documents, adding notes within a text field, adding a date, or creating a single or multi-select dropdown. You can choose to make any of these annotation fields required or optional. If you select required, the assignee must complete the annotation before they can mark the task done. The dropdown selection is useful for tasks with a standard review criteria such as “relevant” or “not relevant.”

If you would like a second individual to review the task before it is completed, select Require Approval and enter the team member who should approve the task. For tasks set up to Require Approval, the task can be completed by the assignee, but instead of marking the task Done when they finish their work, they will, instead, Request Approval. Once the assignee requests approval, the task is reassigned to the Approver. The approver can then either Reject or Approve the task. If the task is rejected, it is reassigned to the original assignee for additional review. If the task is approved, it is marked complete.

Select Assignees is another type of special annotation that can be added to any task. Select Assignees allows the task assignee to determine who should complete subsequent tasks. This can be useful when the workflow is driven from a generic alert and the SME who should complete detailed review tasks is dependent on the nature of the specific document and won’t be known until the assignee completes a preliminary review. Alternatively, this annotation can be used when subsequent tasks should be completed by multiple individuals, for example, when a regulatory change impacts multiple business lines within your organization. If multiple assignees are selected, the subsequent tasks are created multiple times, once for each assignee.
If you use Select Assignees, remember to indicate that the assignee for the relevant subsequent tasks are “Dependent on” “<Name of Task>”.

Step 5: For subsequent steps, select to add another step, then follow the same process described above.
Dependencies: You can establish a dependency for subsequent tasks as long one of the prior assignments has a dropdown criteria applied. For example, if you added a dropdown criteria requiring the team member to select whether the document was “relevant” or “not relevant,” then the next step can be dependent on the prior being marked as “relevant.”
You can make subsequent tasks either Relevant or Not Relevant depending on your preference. In addition, you can make tasks dependent on one or more upstream tasks. This might be helpful if the workflow involves engaging other teams only in specific circumstances.

Step 6: Review the workflow and save
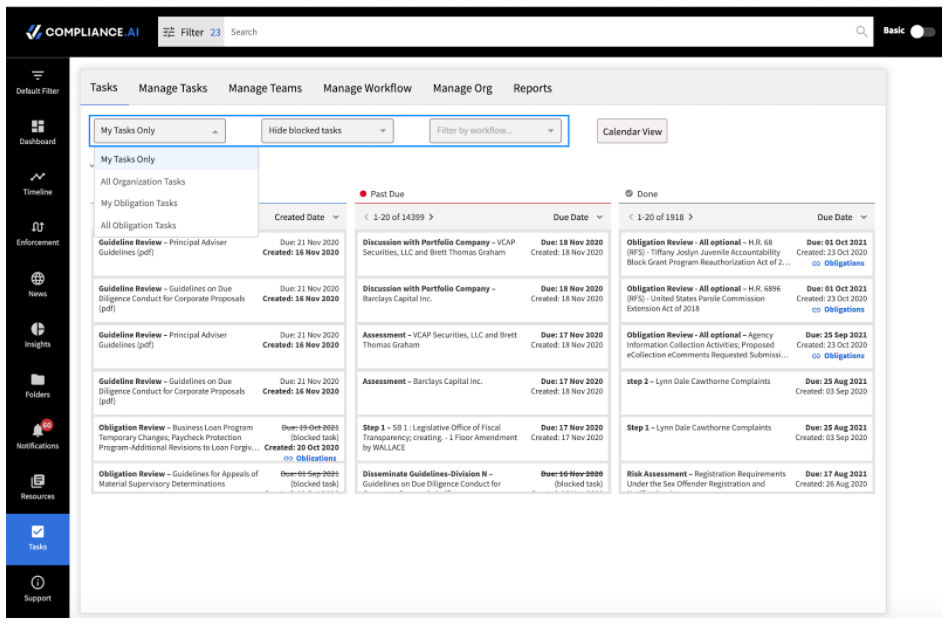
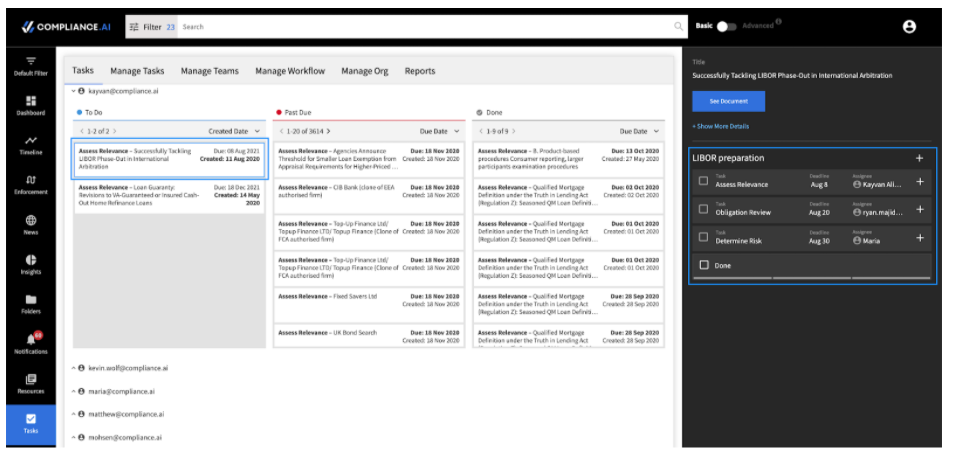
Once you’ve completed adding the recurring steps for the specified workflow, click to save. If there are already relevant tasks in the queue, you will see these assignments in the first tab named “Tasks.” For new workflows, this can take up to 10 minutes to populate.
Obligation Review Task
Note: If reviewing legal obligations is part of your workflow, make sure to use the special “Obligation Review” task. The obligation review task not only creates a general document-level task, it also creates a task that is specific to each legal obligation identified in the document.

Obligation Review steps will be created for each obligation within a document, including both system generated and user generated obligations. These tasks are only activated if you indicate that the obligation is relevant to your organization.