Team Edition users can create workflow rules to automatically trigger action items and delegate tasks to the responsible parties on their team. Compliance.ai’s Workflow automatically notifies you and the responsible team member as soon as a relevant change occurs, based on the rules established in the workflow.
Creating a workflow
Compliance.ai’s automatic workflow helps you assign tasks, track due dates and monitor progress relevant to specific regulatory changes.
Step 1: Create customized alerts
Please refer to our Alerts and Notifications Guide for more details.


Note: After saving the alert, you will be prompted with an option to immediately “Go To Manage Workflow” to create a new flow for that alert. If you already have a set of alerts created, then you can move on to the next step.
Step 2: Select the tab for Tasks, then go to Manage Workflow
Select “Add Workflow” then decide to either “Start with a template” or “Start from scratch.” Most users choose to start from scratch, but if you have a standardized corporate process, you should create a template and share across your organization.

Start with a Template: This option will allow you to import an existing template you have used in a previous workflow
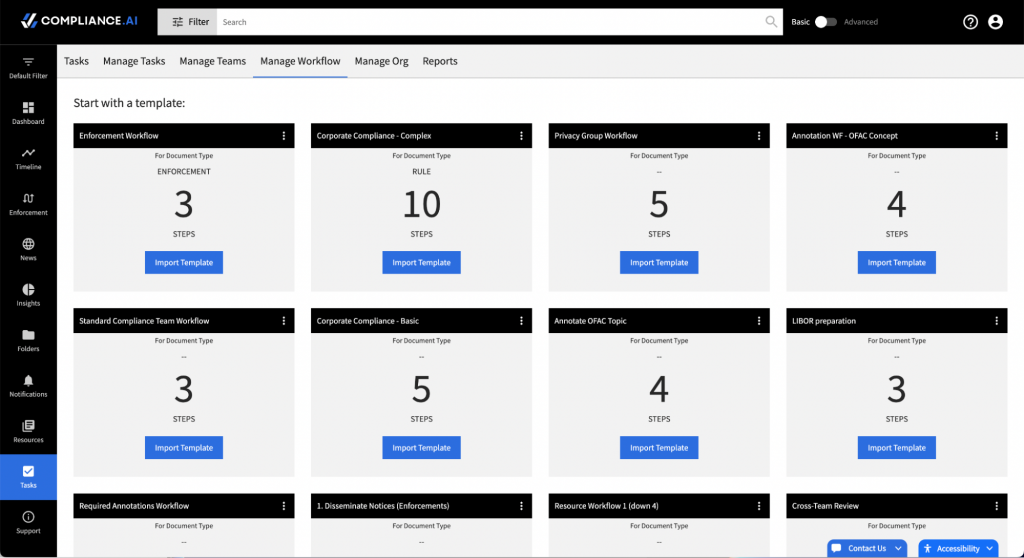
Start From Scratch: This option allows you to customize a new series of action items and team assignments.
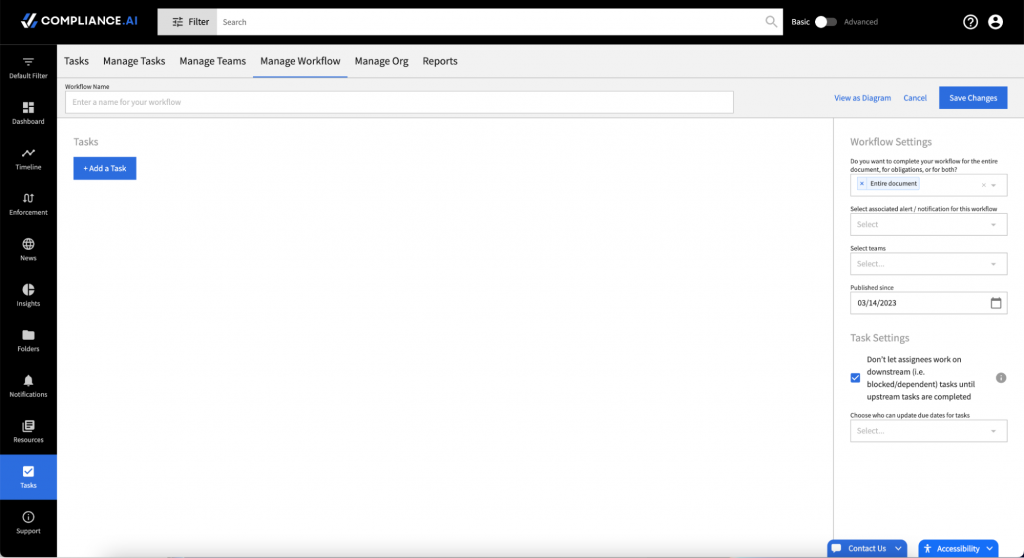
Step 3: Enter a Workflow Name
Select a unique workflow name for your new workflow. You will be able to find and edit your workflow by searching for this name. More importantly, all team members will see their workflow tasks listed under this workflow name. In addition, you’ll be able to filter all workflow reports based on workflow name, so choose a name that is memorable and will resonate with your team.
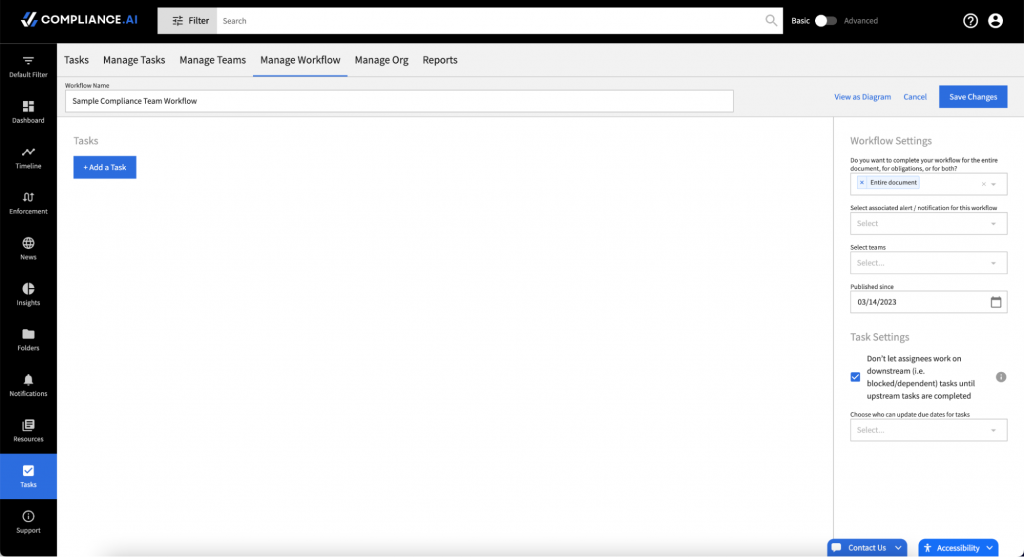
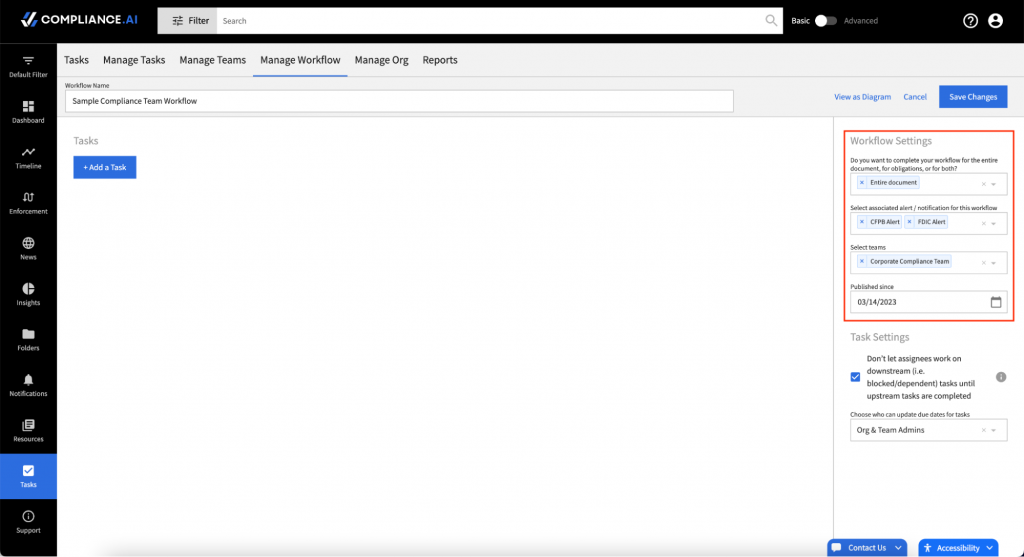
Step 4: Enter your Workflow Settings
Workflow Type: The first workflow setting allows you to indicate whether you would like the workflow added to the document as a whole, to each obligation within the document, or both. Workflows are defaulted to “Entire Document” because this is the most common setting.
Obligation workflow type: If you select the Obligation workflow type, your workflow tasks will be added to each obligation sentence in the document. This type of workflow is typically short and is intended to help you complete the kind of analysis that’s necessary on a line-by-line basis.
For optimal results, you’ll want to pair a document-level workflow with an obligation-level workflow and attach the same set of alerts to each. This will allow you to complete tasks such as “review obligation” at the obligation level while completing tasks such as “document relevancy” at the document level.
Alerts: If you want to add your workflow to new documents automatically, you should add one or more alerts to the workflow. Any new document that matches the criteria of any of the associated alerts will automatically receive the workflow. Remember that if you edit your alerts, any new documents found under your new alert criteria will automatically receive the workflow.
We recommend you test your alerts to ensure you are receiving alerts on the expected documents and that the volume of documents per day is appropriate before you add alerts to workflows.
Teams: If you have a large organization and you have organized users into teams, select the teams that will be involved in the workflow. This will help you find the right assignees as you begin to add tasks to your workflow.
Published Since: When you first establish the workflow, the published since date defaults to today’s date so the workflow isn’t added to older documents that match your alert criteria. You can update the published since date to a date up to 30 days prior to the current date if you would like to complete the workflow on recently published documents matching your alert criteria.
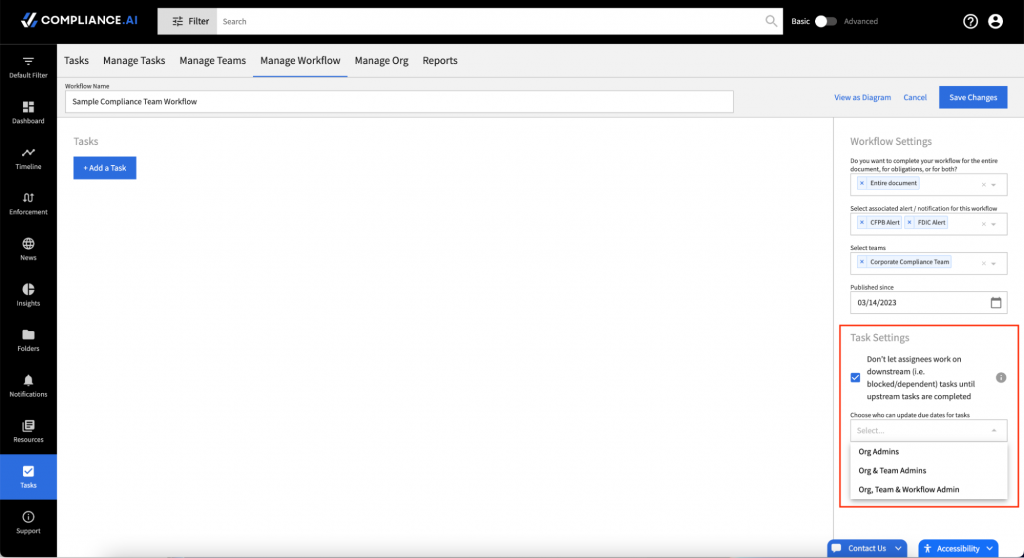
Step 5: Enter Task Settings
Blocked Tasks: If you use dependencies in your workflow, you can choose to enable assignees only to work on tasks that are not currently blocked by upstream tasks. This option is checked by default because preventing users from working on blocked tasks is the most typical workflow setup for our clients; however, if you would like users to work on tasks out of sequence, simply uncheck the checkbox.
Updating task due dates: If you want to control who in your organization can update due dates for tasks once your workflow is added to a document, you can limit based on user role. This option is blank by default, but if you would like to enforce standardized deadlines, choose the admin roles most appropriate for your organization.
Step 6: Next, select the “Add a Task” button to begin adding tasks to your workflow.
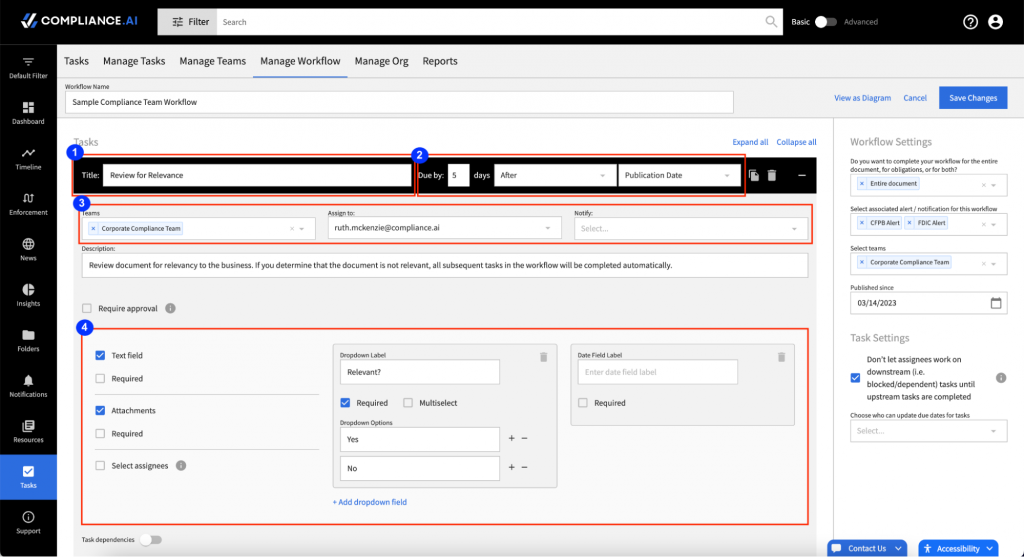
- Apply a general title like read or evaluate, then describe the specifics for the assignment in more detail within the description.
- Select the due date criteria based on either the: Publication Date, Effective Date, Comment Close Date, or Task Creation Date. In most cases, users select Publication Date for the first task in a workflow, but if you anticipate adding the workflow to previously published documents, you may wish to select Task Creation Date to ensure that the first task is always due in the future.
- Next, assign the task to a member of your team. If you or others in your organization would like to be notified about the status of a task, you can add those individuals to the “Notify” field.
- You can apply additional requirements like attaching documents, adding notes within a text field, adding a date, or creating one or more single or multi-select dropdowns. You can choose to make any of these annotation fields required or optional. If you select required, the assignee must complete the annotation before they can mark the task done. The dropdown selection is useful for tasks with a standard review criteria such as “relevant” or “not relevant.”
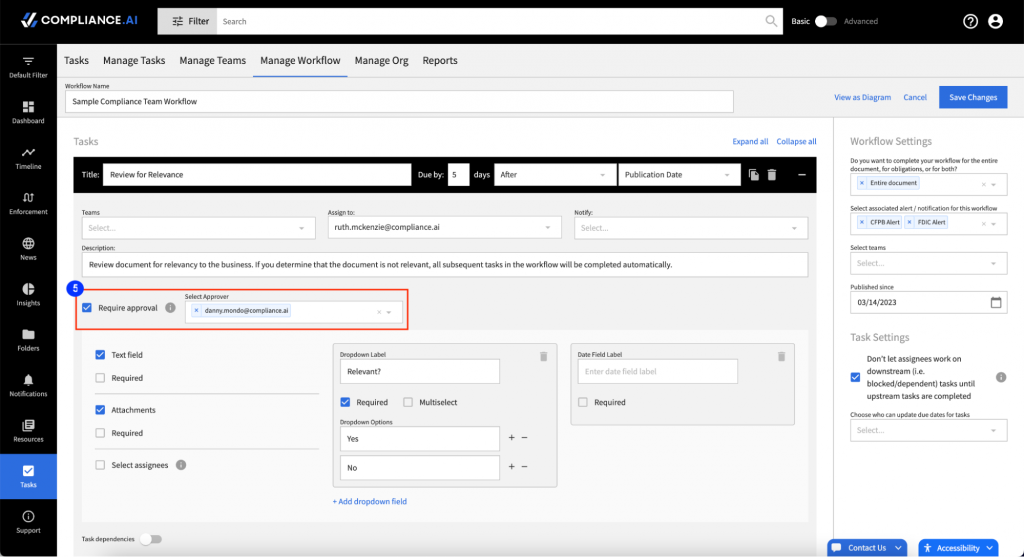
- If you would like a second individual to review the task before it is completed, select Require Approval and enter the team member who should approve the task. For tasks set up to Require Approval, the task can be completed by the assignee, but instead of marking the task Done when they finish their work, they will, instead, Request Approval. Once the assignee requests approval, the task is reassigned to the Approver. The approver can then either Reject or Approve the task. If the task is rejected, it is reassigned to the original assignee for additional review. If the task is approved, it is marked complete.
- Select Assignees is another type of special annotation that can be added to any task. Select Assignees allows the task assignee to determine who should complete subsequent tasks. This can be useful when the workflow is driven from a generic alert and the SME who should complete detailed review tasks is dependent on the nature of the specific document and won’t be known until the assignee completes a preliminary review. Alternatively, this annotation can be used when subsequent tasks should be completed by multiple individuals, for example, when a regulatory change impacts multiple business lines within your organization. If multiple assignees are selected, the subsequent tasks are created multiple times, once for each assignee.
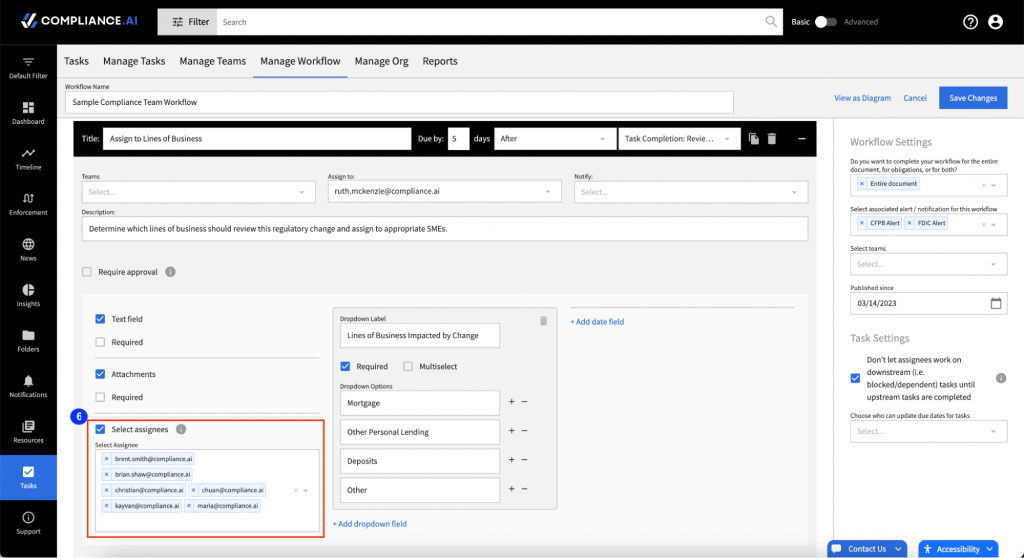
- If you use Select Assignees, remember to indicate that the assignee for the relevant subsequent tasks are “Dependent on” “<Name of Task>”.
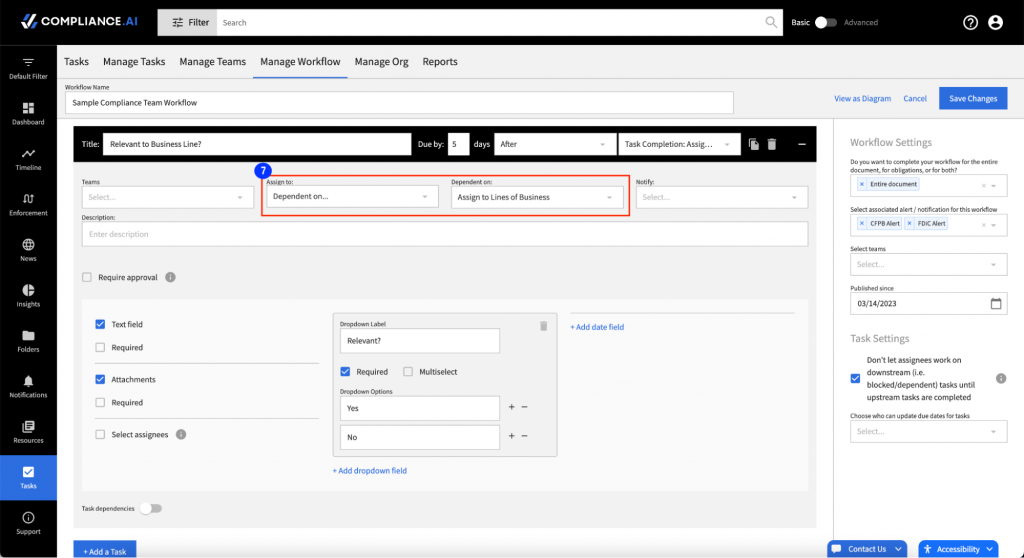
Step 7: For subsequent steps, select to add another step, then follow the same process described above.
Dependencies: You can establish a dependency for subsequent tasks as long as one of the previous tasks has a dropdown criteria applied. For example, if you added a dropdown criteria requiring the team member to select whether the document was “relevant” or “not relevant,” then the next step can be dependent on the prior being marked as “relevant.”
You can make subsequent tasks either Relevant or Not Relevant depending on your preference. In addition, you can make tasks dependent on one or more upstream tasks. This might be helpful if the workflow involves engaging other teams only in specific circumstances.
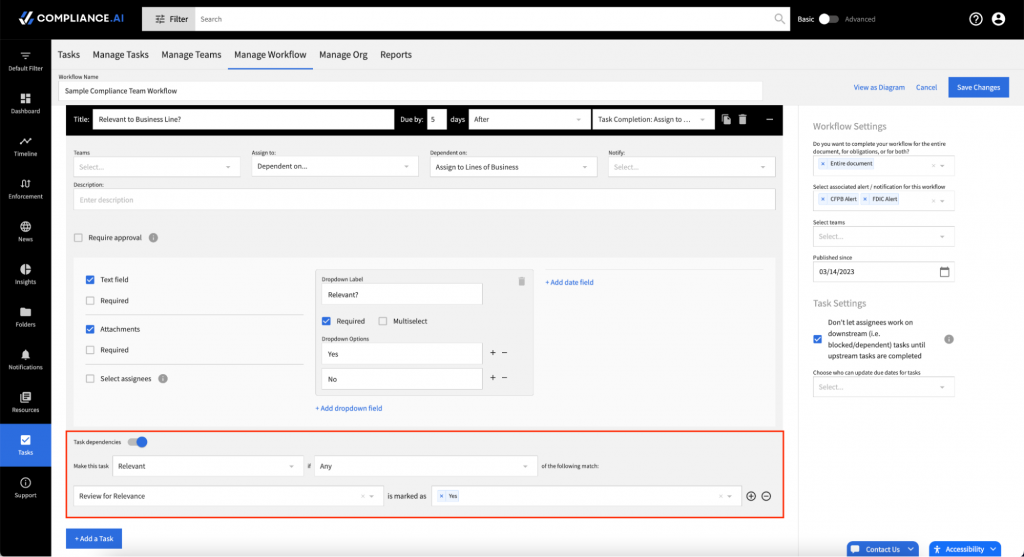
Step 8: Review the workflow and save
Once you’ve completed adding the recurring steps for the specified workflow, check that your workflow meets your requirements by using the View as Diagram option.
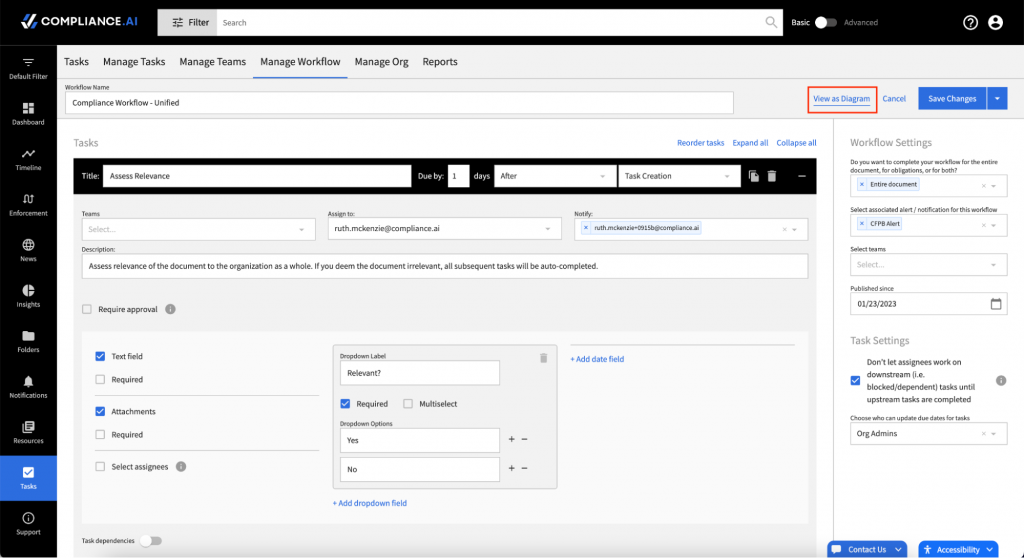
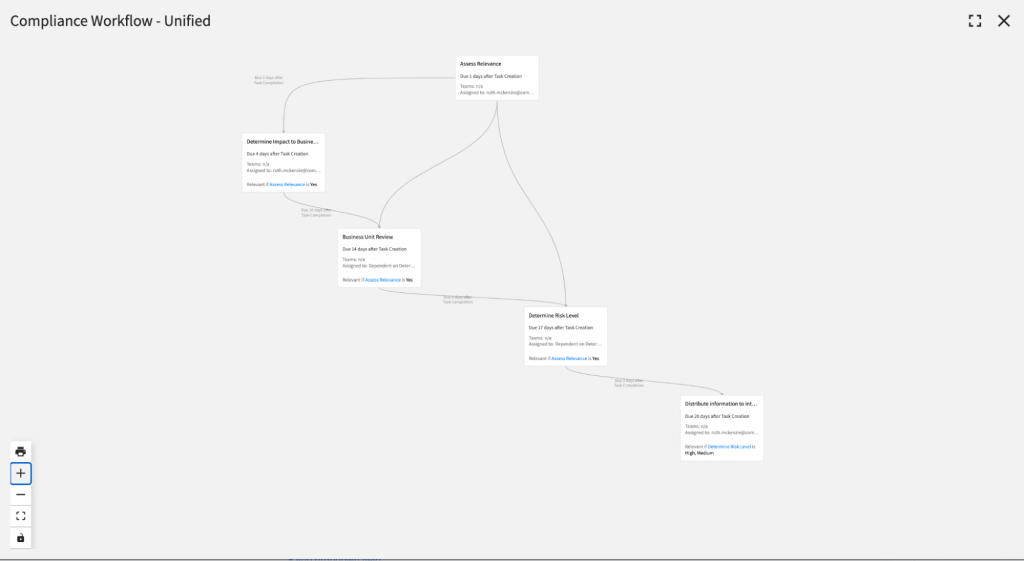
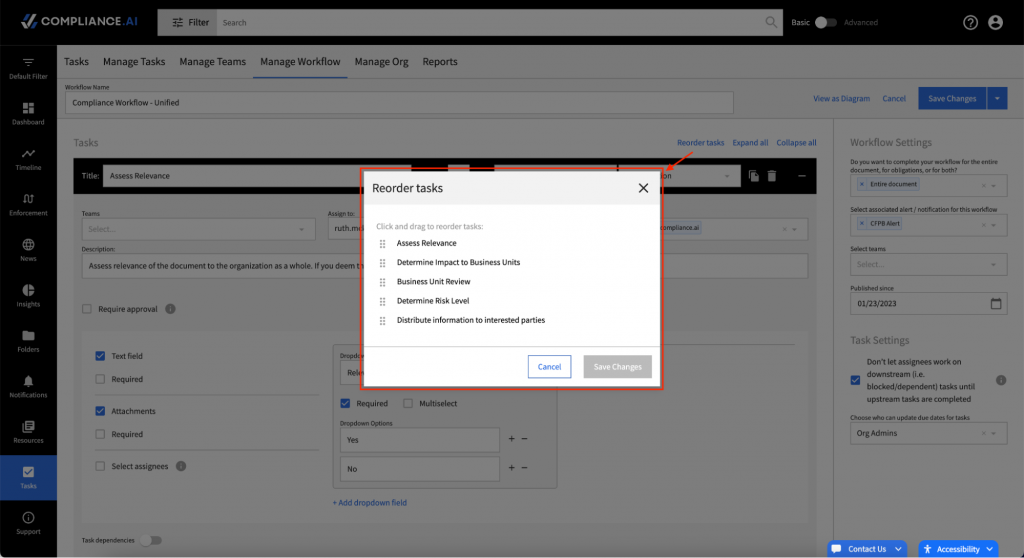
If you realize your tasks are out of order, use the “Reorder Tasks option to drag and drop tasks as needed.
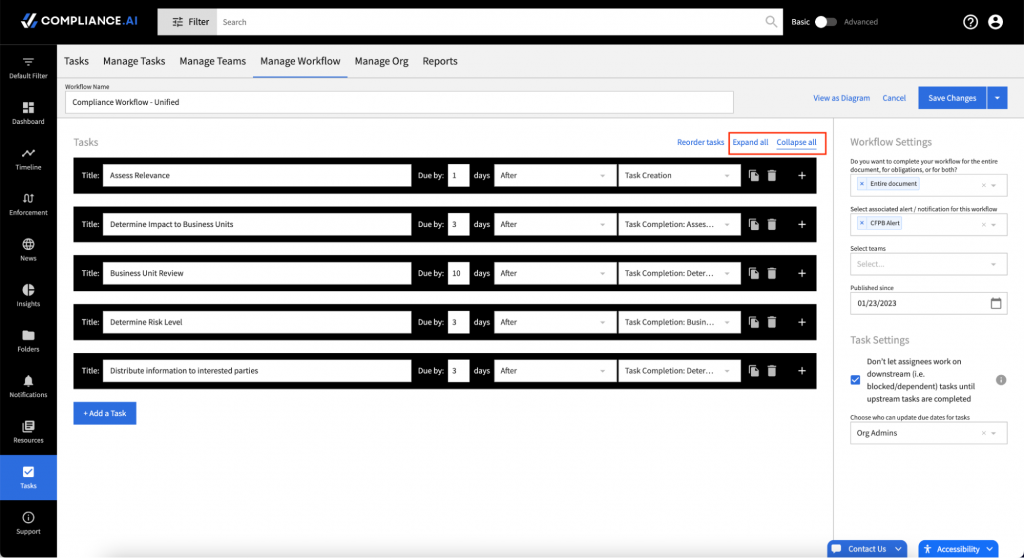
It’s also a good idea to “collapse” your tasks to make sure your due dates are set as desired.
Once you’re satisfied with your workflow, click to save. If there are already relevant tasks in the queue, you will see these assignments in the first tab named “Tasks.” For new workflows, this can take up to 10 minutes to populate.
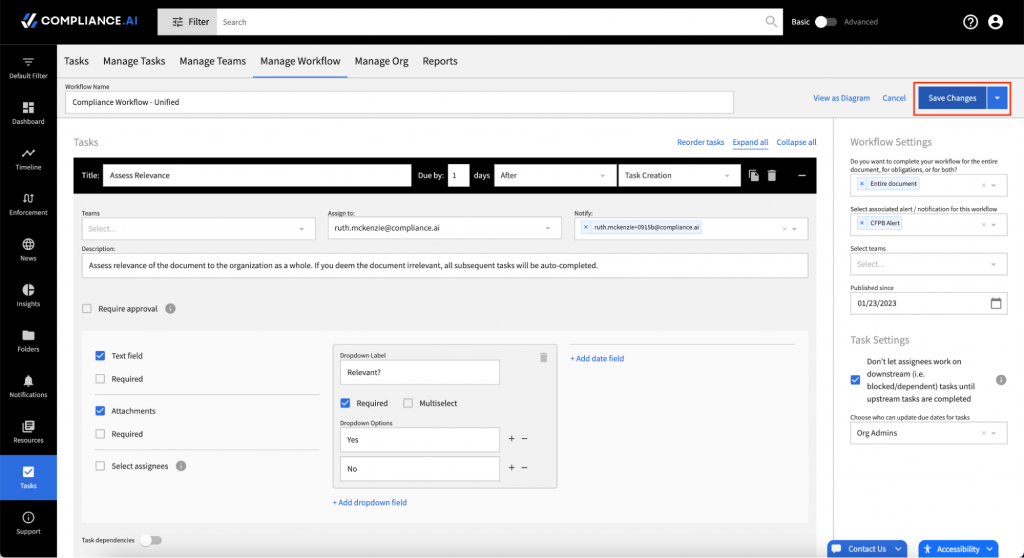
If you have multiple teams in your organization, but have common workflow patterns, you can save your workflow as a template. Just reopen your workflow, click the dropdown arrow next to Save Changes and choose the “Save as template” option.

Managing Workflows
The Manage Workflow page allows you to add new workflows and rename, edit, or delete your existing workflows. Simply click the pencil icon to edit the workflow, use the trash can to delete a workflow that’s no longer needed, or click the +/- to view/hide workflow details on screen.


